Tuesday, March 23, 2010

Green shoots

I’m due for a post on meat and was fully planning to write one, but last week spring went and made a jailbreak. Things were sprouting up everywhere, the air was warm, and then I went out for dinner and had a salad that just about summed it all up. For those of you who live in Brooklyn, it was at Roman’s in Fort Greene. I’m not going to review it, because that’s not what I do here–but I will say it was a very enjoyable meal, and this salad…a tangle of dressed pea shoots dusted with crumbled almonds and good pecorino. While eating it I sort of mentally smacked myself in the forehead for not thinking of it on my own, all those times I had pea shoots and didn’t know what to do with them. This winter, for instance, when our mostly frozen Winter Sun CSA contained, inexplicably, bags of fresh pea shoots in December; I probably wasted them by tossing them with lettuce in a very ordinary salad.
Like March, pea shoots promise exciting things down the line. I can't wait to crunch sugar snaps straight from the vine, to savor the soothing monotony of shelling favas. Speaking of good things to come, my sister is expecting a baby in a few weeks, and we drove to Virginia together this weekend, just the two of us–which we hadn't done forever. It’s always like fast-forwarding, driving south in March, and as we headed back on Sunday the fields swept by, shining with new green in the morning light. After drinking in the awakening landscape for four hours, I wanted to eat the exact shade of green that shimmered on those fields. Luckily, our natural food store carries pea shoots, and I picked up a hunk of pungent, crumbly Pecorino Foglie di Noce (from Stinky, neighbors), which I almost polished off before I even got to the salad I was aiming to re-create. Peas and pecorino? They just get each other. The recipe below is almost a non-recipe, so I hope you won't feel cheated–but the flavors are bright and the look is pure spring.
Pea shoots, pecorino and almonds
Inspired by Roman's
Ingredients: 
  • Pea shoots
  • 1 small clove garlic, peeled
  • Fresh lemon juice
  • Extra virgin olive oil
  • Blanched, slivered almonds
  • Pecorino cheese that's crumbly and not too salty (Pecorino Romano would be too overpowering)
  • Freshly ground pepper
  • Fleur de sel or flaky sea salt (like Maldon)
Instructions:
Preheat toaster oven or oven to 350 degrees, or a small skillet to medium heat. Spread the almonds on a tray in oven, or in skillet (about a tablespoon per serving), and watch closely for 5 minutes or so, until they just begin to color golden (as in picture above). Remove and cool. 

Cut the garlic clove in half and rub cut side over the inside surface of a medium bowl. Throw in pea shoots–a good handful per person–and toss with your hands while sprinkling with lemon juice and olive oil to your liking. Use more olive oil than lemon juice and taste until you get it right. Once sprouts are just coated, begin grating cheese over them with a very fine grater and crumbling almonds on top, tossing occasionally. Apply cheese and almonds liberally but not so much you weigh the sprouts down. Sprinkle with a little salt and pepper. Gather up into haystack bundles and transfer to plates. If you like, scatter a bit more cheese and almonds on salad and plate.

Wednesday, March 17, 2010

The sugarhouse rules

My three-year-old could knock you out in a pancake-eating competition. You think I’m kidding. I’m not signing her up anytime soon, but I’m already noting her technique, which is eerily similar to that of Takeru “Tsunami” Kobayashi, of Nathan’s Coney Island hot dog eating contest fame. I can barely flip pancakes fast enough to keep pace.

We call her Tough Mama, even though she’s a tenderhearted little girl. This tiny kid has big energy, and she greets each day with gusto: making her bed, launching a monologue at her unconscious parents, dressing herself in some crazy getup–all the while belting out This Tornado Loves You. On Saturday mornings, we aren’t quite ready for all that sunshine. My solution? Bribery. And the standard payoff for one more hour of parental sleep is…pancakes. She talks about them all week, asks hopefully if we might have them on a Tuesday (no), flashes her gap-toothed grin, never lets up–despite knowing they’re a weekend privilege. Really, though, I suspect pancakes are a mere vehicle for maple syrup, on which she has fixated since before she had the teeth to chew real food.

Just as her full-throated laugh grabs hold of our hearts, so her passion for maple syrup has planted roots in our house, blossoming and catching us off guard this spring. We hadn't
much considered this New England staple before; though it always sat in the cupboard, right by the sugar, we kind of got more excited about mustard. My husband even spent much of his youth on a farm in Vermont, where he was put to work each year tapping the sugar bush, but he's never been much of a spokesman for the maple syrup industry. This March, though, all it took was a simple question from her, as she gazed out of the car window at a row of trees along the Connecticut roadside: “what’re all those buckets?” 
Suddenly, we began viewing the enterprise in a whole new way. Driving around the countryside, we noticed buckets adorning trees everywhere. And, maybe I’m easily charmed, but will you check out how each one of them has its own, adorable little tin roof? They’re collecting the sap that’s rising! And it’s rising because spring is coming, and suddenly there’s payoff for living somewhere that lingers forever in winter’s hooks. It hit us all at once, this epiphany–all except for Tough Mama, who had understood the specialness of maple syrup all along. So we decided to visit a sugarhouse, to see how that sweet, liquid life gets made. 
This time of year in the Northeast, as soon as you get off the highway you can see the galvanized buckets strung all over the place, acres of tubing crisscrossing the forests, and steam chugging up out of backyard sugar shacks. I won’t go so far as to say you can smell that caramelly maple smell in the air, but you practically can. As soon as you open your eyes to it, it’s all around. We found our sugarhouse of choice, Brookside Farm II, on the internet–it was one where the man who makes it answered the phone and said yes, bring your kids, I’ll show them the buckets and they can taste some sap right out of the tree, and we’ll start boiling at around 3:30. So we pulled up on that sunny day, and there were the buckets and the sugarhouse with its plumes of smoke, and a tree full of apples–intentionally left unpicked last fall, for the birds. 
Mark Harran is his name, and he’s a machine enthusiast. Not only does he own a beauty of a sap evaporator, all gleaming chrome, but he’s got a barn full of vintage John Deere tractors, scaled down from the 100-odd machines he once owned. He's also president of the Maple Syrup Producers Association of Connecticut, has run Brookside for 10 years, and seems to know everything there is to know about syrup making. He gave us a lot of stats; did you know it takes 70 gallons of sap to make just 2 gallons of maple syrup? 
Of course, it starts with the trees, and it starts some time in February, when the daytime temperatures reach up into the 40’s but still dip down below freezing at night. The bucket’s the old school way, and Harran still keeps a couple of them around (though he has mainly switched to tubes). We put a finger underneath the spout to catch drops of sap, which tastes like water with the faintest sweetness. The tap drips steadily into the bucket, and the sap is emptied into a tank and boiled down each day (if you let the stuff sit too long, it begins to ferment). These days, most producers use the more efficient (if less quaint) tubing method, in which sap flows out–or is extracted via vacuum pump–into collecting tanks, then boiled. A tree must be at least 60 years old to be tapped, and the one pictured above is over 300.
 
The sap boils steadily in the evaporator until it reaches a certain density, then is filtered and flows out, to get graded. We helped grade this batch (it was grade A/medium amber). Later in the season, when sap requires longer boiling to reach sugar density, the syrup will be darker–grade B. To me, "B" sounds like an unfair label, as the late-season product tastes deeper and richer, and asserts more personality in cooking.

We left toting two enormous jugs of maple syrup: one grade A/medium amber, for Saturday morning pancakes, and the other grade B (last season's), for sweetening and flavoring recipes. Though the cooking possibilities are endless for sweet as well as savory (a glaze for pork roast, for instance, or drizzled over roasting root vegetables), the first thing I made were maple-vanilla pots de crème–kind of like crème brûlee without the burnt sugar on top. The maple flavored them delicately, and I realized how much sugar I could be replacing in baking with this amazing, locally-made sweetener. The basic ratio and technique are borrowed from Patricia Wells At Home in Provence (hers are lemon), an old favorite cookbook that has never let me down. 
 
My daughters simply call it Maple Syrup Pudding, but this is no nursery pudding–it's rich and decadent enough to serve at grown-up dinner parties. I'm dreaming of spooning some up with strawberries in June, when fat, juicy ones will dot the Connecticut fields now fringed with snow and bare maple trees.


Maple-Vanilla Pots de Crème  
serves 8

Ingredients:
  • 6 egg yolks
  • 1 1/2 cups heavy (whipping) cream
  • 1/2 cup whole milk
  • 1/2 cup maple syrup–preferably Grade B (dark)
  • 1 vanilla bean, or 1/2 teaspoon good vanilla extract 
*you'll need eight four-ounce ramekins or similar

Instructions:
Preheat oven to 325 degrees. In a medium bowl, whisk together yolks, cream, milk, and maple syrup until blended. Try not to agitate too much–you want the final result to be smooth and nearly bubble-free. With a sharp paring knife, slice vanilla bean longways. Using the dull side of the knife, scrape the inside of each half over the bowl, stirring the pulp into the cream mixture (put the empty vanilla bean pods into a small jar of sugar, and in a week or so you'll have vanilla sugar). Strain mixture into a clean bowl or spouted pitcher.


Arrange ramekins in a roasting pan or deep casserole dish, so that none of them are touching. Pour or ladle cream mixture carefully into ramekins, filling them a little more than halfway. Move the pan to the top rack of the oven and, with a kettle, pour hot water in pan around the ramekins, until water reaches to level of cream (about halfway up ramekins). Cover pan loosely with foil so a skin does not form, and cook for 30-40 minutes, checking after the first half hour. Desserts are done when set around the edges but still a bit jiggly in the centers. Remove and cool in refrigerator, loosely covered, for at least 2 hours before serving.


Monday, March 8, 2010

Chard tart


I don’t know about you, but I’m craving something green right about now. No salad, please–none of that plasticky lettuce that’s shivering on store shelves at the moment. It'll be a couple of months before we get the fresh stuff in the farmer's markets, longer still until our CSA starts delivering, so the thing that beckons most enticingly right now is chard–especially rainbow chard with those impossible, 80's colors. It’s shipped from California, yes, but even that long commute can’t stifle its exuberance. There's a beet-like minerality to it, and a faint sweetness that unfurls with gentle cooking. The ribs–the best part–are not to be thrown out, by any means. They take longer to soften than the green leafy parts, but when they do they're yielding and savory. Even my friend Kamila's baby couldn't stop eating the ones I sauteed the other night. 

In more fecund months we’re simply swimming in these greens, far fresher than what I get in a New York March, and shot through with even more dazzling veins of neon. I look back with regret to October, remembering how, more than once, I regarded with distain what seemed an unstoppable tide of greens in our CSA share.

I tried growing some myself, one summer in Connecticut, but was thwarted by a wise mama groundhog and her four fat pups–who set up camp under the boulder next to our garden, watched until the young chard reached about three inches high, then razed it to a verdant stubble. Varmints, our weekday absence, and a tree that spread its shade over the plot have mostly kept us from vegetable gardening, so I leave my chard growing to others these days. I can't help ogling the Seed Savers Exchange website now and then, though, and fantasizing about the packets I would unwrapping right now: Christmas in March.
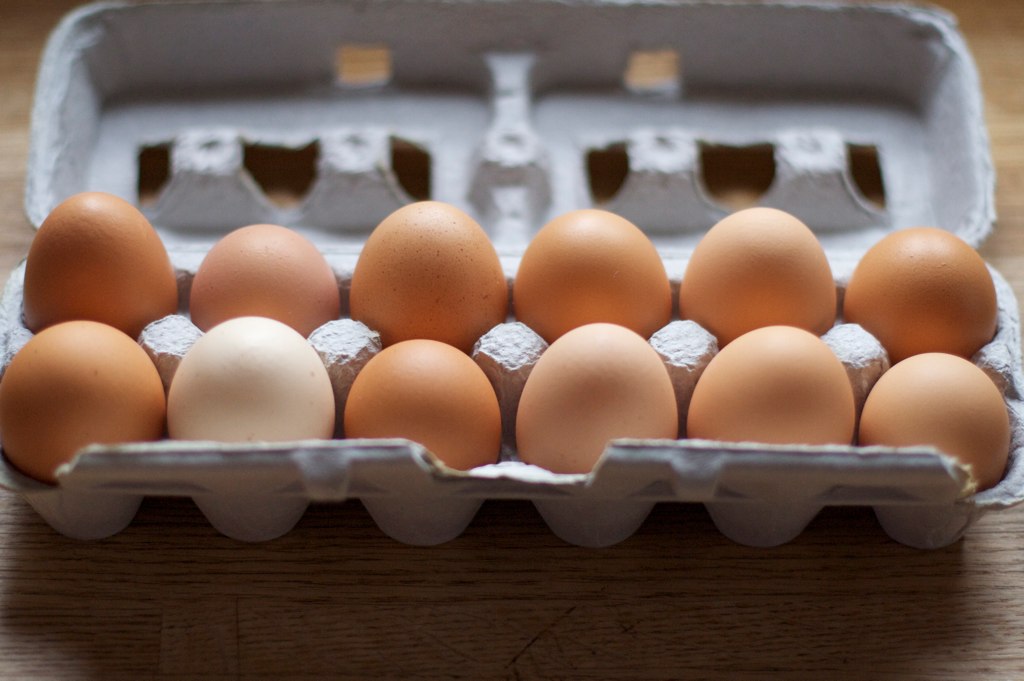
I take consolation in the fact that I can still cook all the chard I want, and I want it most with eggs. Eggs are something we're always rolling in, thanks to the Tello's Green Farm egg share I pick up at my daughter's school–and my obsession with comparing eggs from various farms, forever in search of the firmest white and orangest yolk. Often, I'll float a cloud of poached egg atop a heap of sauteed greens and bacon, and splash it with hot sauce. But this week, I was in the mood for more of a ritual: the rolling and baking of a tart shell, the whisking of a custard, the sautéing of the greens, the assembly. A bit more labor-intensive, perhaps, but somehow more festive, and practical for tucking away in the fridge as tomorrow’s lunch (maybe with some tomato soup). 
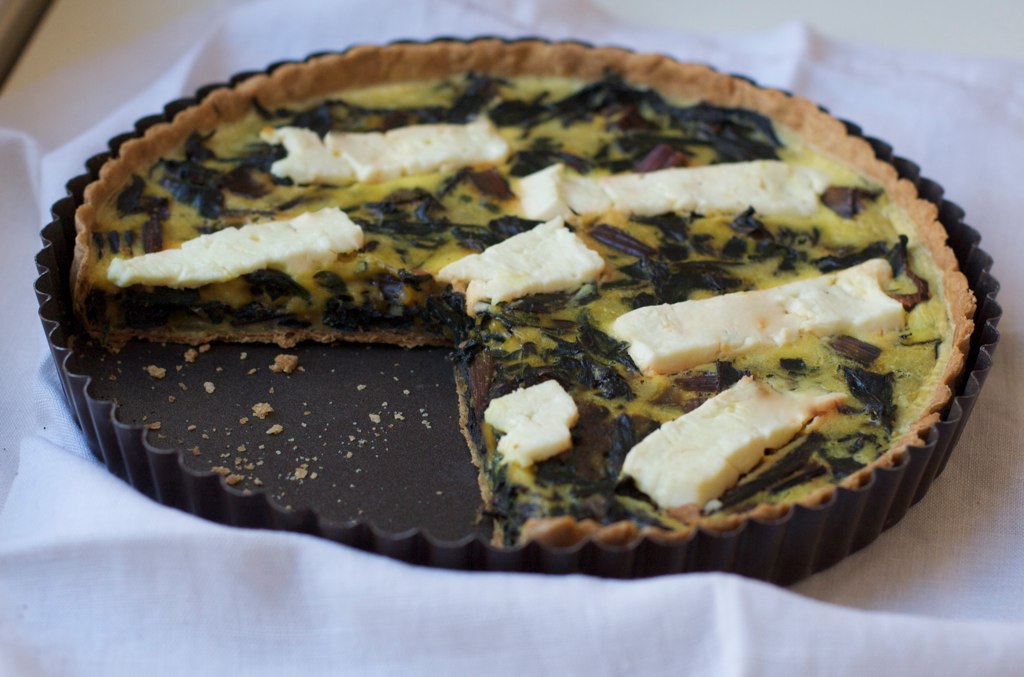
Doesn't this sound like a quiche, though? It's not, exactly. There’s a fine line, but for me what decides it is the ratio of filling to custard, the relatively high proportion of cream to eggs, and the fact that I bake mine in flat tart molds (the kind with removable bottoms). I pack in as much chard as I can, leaving just enough pockets for the egg/cream mixture to fill out into a creamy binding. I make many variations of this tart through the seasons, such as mushrooms and sometimes asparagus, and I used to torture myself by baking hundreds of mini ones as hors d'oeuvre for catering events.

You will have to bake your own tart shell for this (unless you have a good store brand that's not sweet). Don't be scared if you've never done it before–if you're a passable baker, or even a careful novice, your fortitude will prevail. There are several approaches you can take. For me, nothing beats a flaky butter crust (see below). I also came across this olive oil crust from Chocolate and Zucchini, and I like to throw it into the mix during warmer months, when something less rib-sticking is in order.  

The recipe has three basic parts, so you can split it up over a couple of days, making the crust ahead of time and even freezing it, then assembling the whole thing when you're ready. If you don't overbake the tart, you can re-heat it the next day and it's still delicious. And green.

Short crust
Ingredients:
  • 4 ounces cold, unsalted butter (1 stick), cut into small pieces
  • 1 3/4 cups flour (all-purpose or a mixture of all-purpose and whole wheat)
  • 1/2 teaspoon salt
  • Ice water
Instructions:
Have a 9-inch or 10-inch removable-bottom tart mold ready–any shallow pie dish works, really. In a food processor, combine flour and salt, then pulse in butter until it's blended with flour in tiny, coarse pieces. Start pulsing in ice water a few drops at a time, until dough comes together in a shaggy ball. Do not add too much water–you'll probably only use a tablespoon or two. Once dough comes together, remove from food processor and shape into a flat disk. Wrap in plastic and refrigerate until firm, preferably about an hour. (*note: you can also rub butter into flour with your palms if you work quickly)

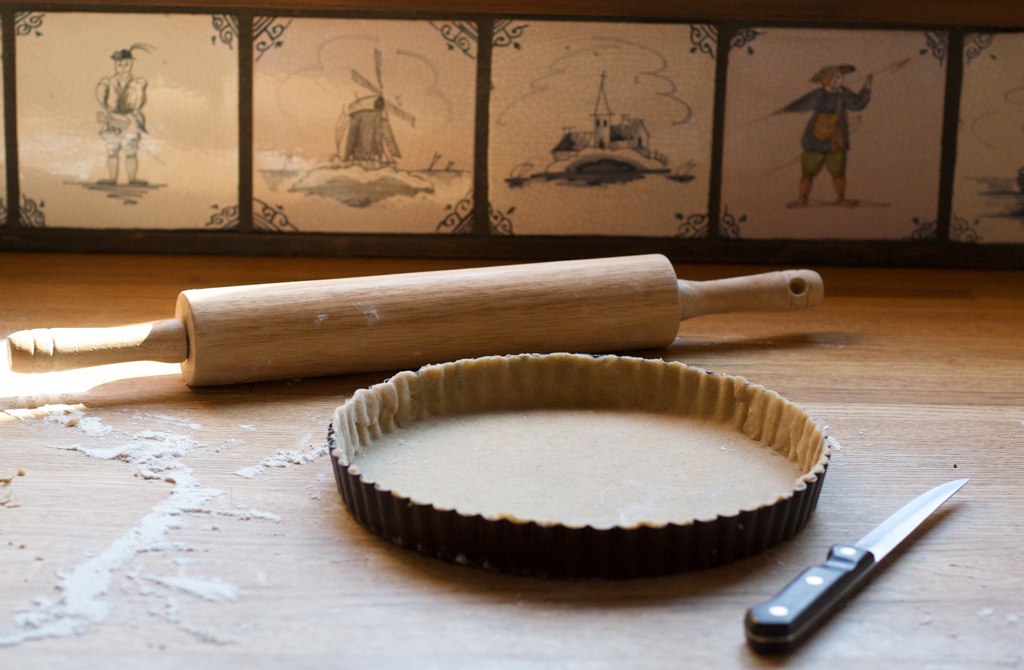
Preheat oven to 400 degrees. You'll need to blind-bake the tart shell. Let the dough come to room temperature for 10 minutes or so, then roll out into a uniform, thin sheet, somewhere between 1/16 and 1/8 inches thick. You can really go crazy getting it paper thin, but you don't need to. Nestle dough over and into the tart mold, pressing gently into corners and against sides. You can cut off excess around the top with a pair of kitchen scissors, or roll rolling pin over the top of tart shell to sever off edges. Press against sides one more time so the dough really sticks. Prick bottom slightly with tines of a fork, then refrigerate some more (10 minutes or so), until dough firms up a bit. Press together any dough leftovers and use for a smaller tart, or for patching any cracks in the baked tart.

Remove tart mold from fridge and press a sheet of foil on top of dough. Fill with some sort of weight, like dried beans, rice, or even pennies (great suggestion, Kamila!). Bake in the oven for 15 minutes or a bit more, until dough becomes golden brown. You can cool this shell and save, wrapped, for a day or so–or freeze for future use.

Chard tart
Ingredients:
  • 1 large shallot or small onion, diced into small pieces.
  • 1 large bunch of chard or two small ones (2 bunches for large or deeper pie dish)
  • Butter or olive oil for cooking
  • 4 eggs (3 if using jumbo eggs)
  • 3/4 cup cream
  • 1/4 pound feta, crumbled or sliced in thin slabs
  • Salt and freshly ground pepper to taste
Instructions: 
Cut up chard by first slicing out ribs, then chopping them into 1/2 inch pieces. Rinse and set aside. Slice leaves in half lengthwise, then stack and slice into ribbons widthwise. Rinse in a bowl of clean water, then lift out and drain.

Preheat oven to 350 degrees. Put a large skillet on the stove over medium heat. Throw in a knob of butter or a couple of tablespoons olive oil, then add shallots. Sweat them a few minutes (don't brown), then add chopped chard ribs. Saute these, sprinkling on some salt, until they begin to soften but not brown, 5-10 minutes. Add greens to skillet. You want the greens to wilt and release their liquid, then for the liquid to evaporate. If you have a lid large enough, put that over them for the first 5 minutes or so, then remove. Stir so that all greens are in contact with heat at some point. Once they are uniformly wilted, stems are softened, and liquid is mostly gone, they are ready. Taste them and add salt and pepper to your liking.

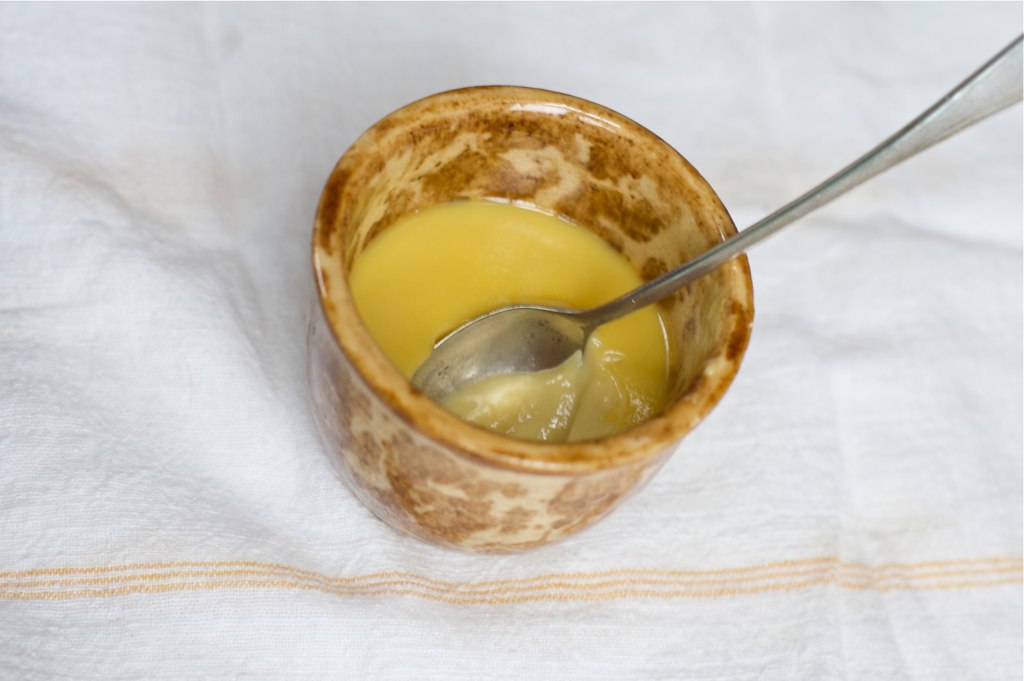
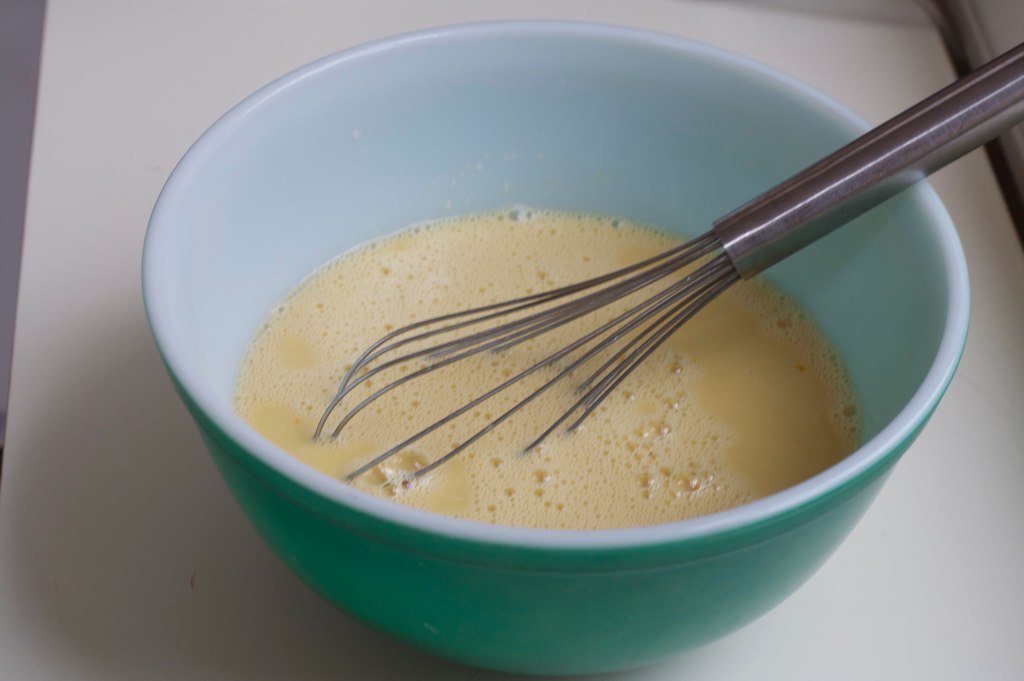
Whisk together eggs, cream, and a little salt for a few minutes, until frothy. Set aside. Take out tart shell and put it on a baking sheet. Patch any cracks in the shell with a bit of leftover dough. Arrange greens into tart shell about 3/4 way to the top, then crumble feta over it or lay thin slices on top. Carefully and slowly pour egg/cream mixture over greens until they are almost, but not quite, covered. You do not want mixture to come up too high, or else it will expand and overflow during baking (if you have leftover mixture, add another egg to make creamy scrambled eggs). Gently press down any greens that are sticking way up, and put tart into middle rack of oven. Bake about 20 minutes or until custard no longer jiggles when tart is gently shaken. You want it to be creamy and just set in the middle–not rubbery–so begin checking after about 15 minutes, then every 5 minutes as it nears doneness. Cool for a few minutes before slicing.

Tuesday, March 2, 2010

For the love of almond butter

My older daughter, age five, must have been a fairy in a former life. Get her out in the sun and wind, and she looks as though she'll take flight. These are crocuses she spied at the Brooklyn Botanic Garden last week–you’ve never seen a kid so excited about anything. It was one of those days when you can smell the earth thawing; literally watch the ice on the Japanese garden pond thinning before your eyes, to reveal a world of bright carp swimming underneath. Then, we discovered something sprouting up out of the drab ground after all these cold months, and the day was officially magical. As you might guess, our favorite book together was The Secret Garden, which took months for me to read to her, a little bit each night. We both sort of cried at the end, when Colin runs across the wild, walled garden to his prodigal dad.

The girl eats like a little sprite, too. She picks and pecks at seeds and nuts and twigs, and it’s a very good thing for almond butter, otherwise I suspect she would grow no bigger than your average fairy. She brings almond butter and jelly in her lunchbox every single day, so we go through a lot of it, and almond butter, especially the organic kind, is wickedly expensive. 
Why not peanut butter? It’s cheaper, and she likes it just fine. We both love the decisive crack of peanut hulls, love sitting at the back of a sailboat and sending them off like tiny canoes. Such fun is not possible with almonds. I adore boiled, salty peanuts too, though I haven’t had them in years. For all these reasons, we should be loyalists, but peanut butter has never really stuck around here, at least not in the way you want it to. It’s my fault that it has never gotten a fair shot in this house, and the root of the matter is this: I can’t take peanuts seriously. It could be that, in their shells, they resemble mummified toes. That’s cause enough. But the real reason, I think, is Jimmy Carter.

My dear friend Cary used to live right across the driveway from me in Virginia, when we were kids–instead of hundreds of miles away, as she does now. One of the things we still puzzle over is the rainy day discovery, in a basement crawl space where only her cat went, of a heap of curious t-shirts. Each bore the image of a humanoid peanut with cartoonish Jimmy Carter features (campaign t-shirts, apparently). We collapsed into fits of laughter whenever one of us brought the shirts out, which became often, since we adopted them as a uniform of sorts for the basement. To this day, I still can’t look at a peanut without mentally superimposing a chiclet grill onto it. Maybe because of that, peanuts even taste silly to me.

I also nearly got electrocuted while wearing one of those t-shirts, and that’s likely where my relationship with peanut butter began to get tricky. It’s funny how, when you’re five, you think something like sticking a metal pole into an empty light socket is a great idea. The sparks that rained down from the ceiling were cool, but getting blasted to the ground was not. I should have qualified for a Darwin award that day, but somehow I got to grow up and discover almond butter and all manner of other delights, like the first flowers of spring, and wine, and falling in love and having babies, and baking with my daughters. That brings me to these almond butter and jam thumbprint cookies, made for–and with–my sweet, picky five-year-old…who I hope has better sense than I did at her age. 
 Almond Butter and Jam Thumbprint Cookies
Note:these are not decadent cookies. Yes, there's butter, but the sugar content is pretty low and there's lots of healthy almond butter inside.

Ingredients: 
  • 1 stick unsalted butter (4 oz.), softened at room temperature
  • 1 cup unsalted, roasted almond butter, stirred 
  • 1/4 cup sugar
  • 1 1/2 cup all-purpose flour
  • 1/4 teaspoon salt
  • 1 egg
  • 1/2 teaspoon vanilla extract
  • 1/4 cup strawberry jam (or any flavor you like)
Instructions:
Preheat oven to 325 degrees. In a medium mixing bowl, beat sugar and butter with an electric mixer until light and fluffy, 5-10 minutes. Add almond butter and blend for a few more minutes, scraping down sides a couple of times. Beat in egg and vanilla. Mix together flour and salt and mix into almond butter mixture until just blended. Line trays with parchment or Silpat liners. Shape dough into roughly 1-inch balls by pressing and rolling in your hands (dough may be a bit crumbly). Place on tray with a bit of space in between, then press a deep well into each cookie with your finger. You may need to shore up any cracks that appear in the sides when you press down. 

Get two spoons ready (I like using pointy grapefruit spoons). Scoop out a little jam with one, then use the other to fill the well in each cookie. Don't overfill. Place tray(s) in the oven and cook for about 15 minutes, checking occasionally. Cookies should be beginning to brown slightly and sinking down a bit, but they won't spread much. They crack. It's OK. Allow to cool for 20 min. or so before eating. Store in an airtight container; they're best within a couple of days.